Congratulations on your purchase of the SkopeX! The SkopeX exists to allow you to configure your grinding setup for maximum flavour according to your preference. To set up your SkopeX motorizer, we’re first going to set up the motor unit and then install the lock collar of your choice onto your hand grinder.
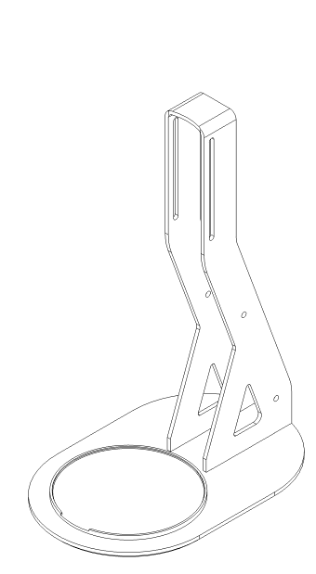
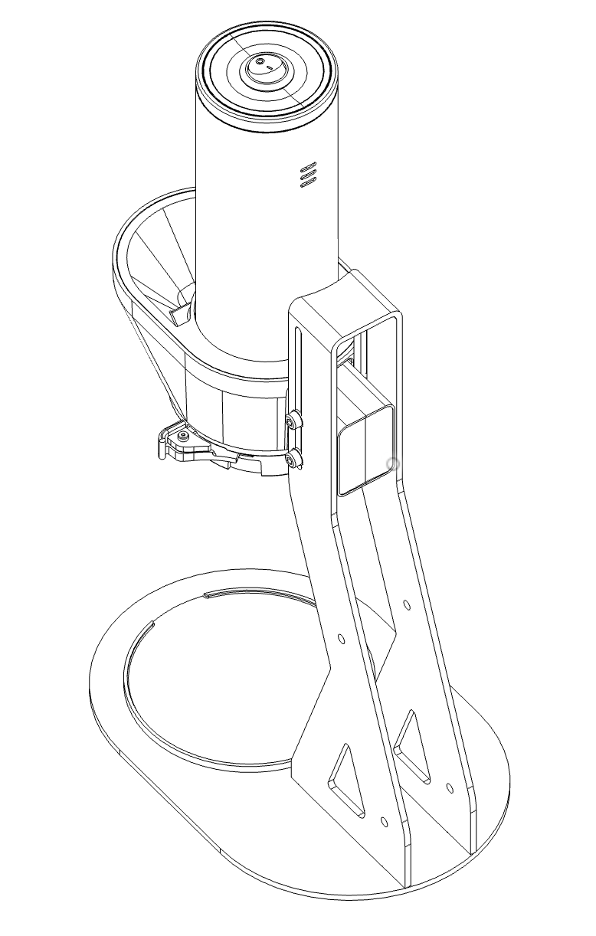
Step 1: Place base stand along with catch plate on flat surface.
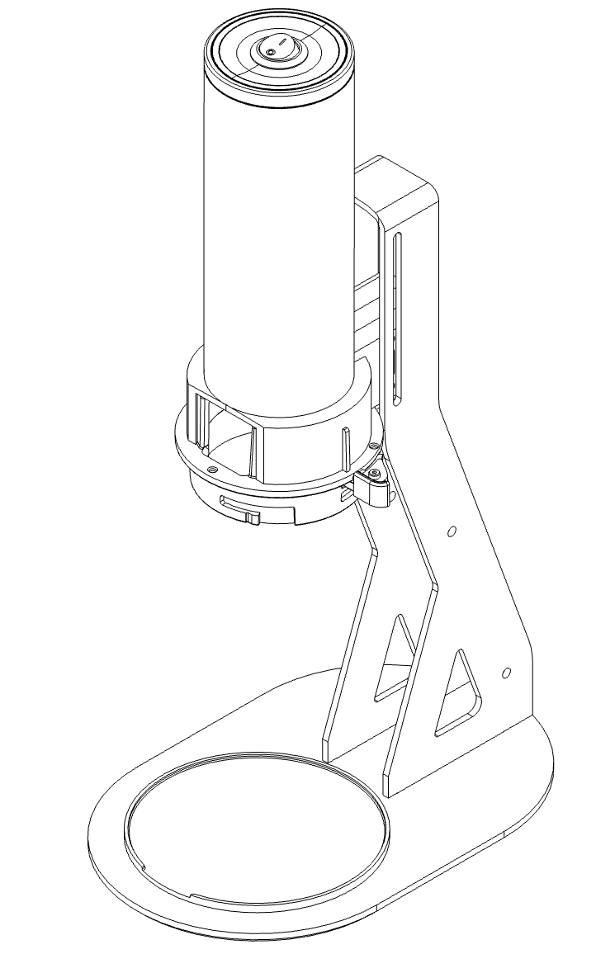
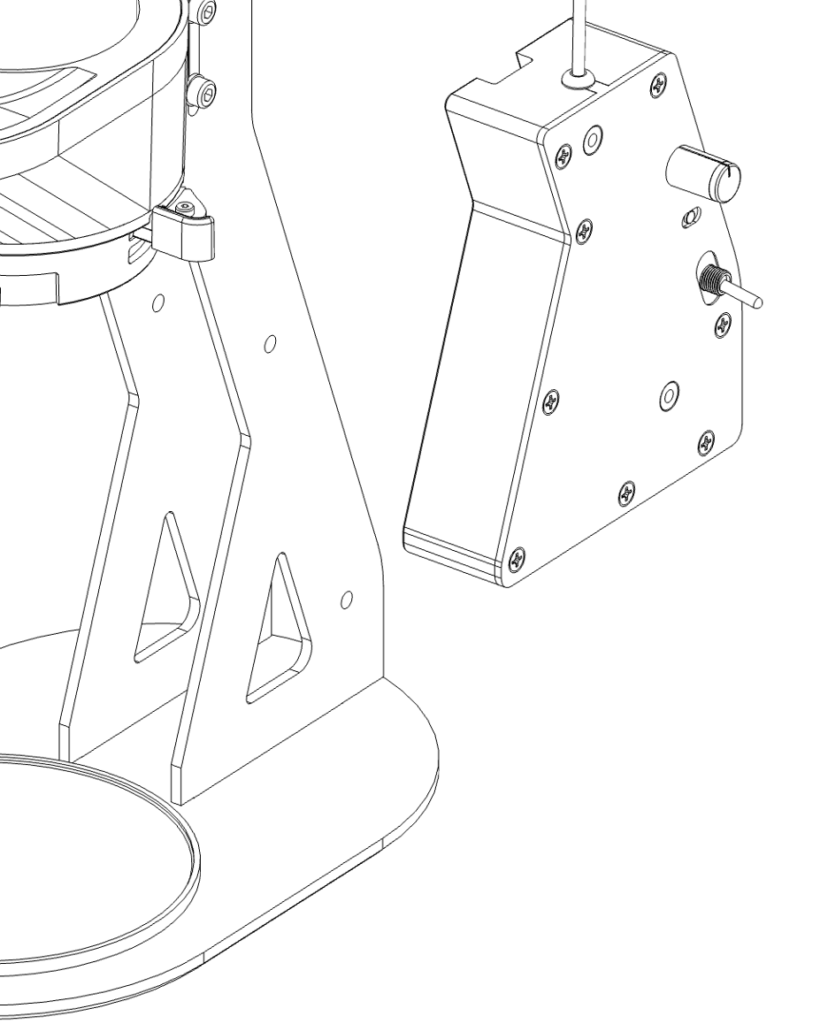
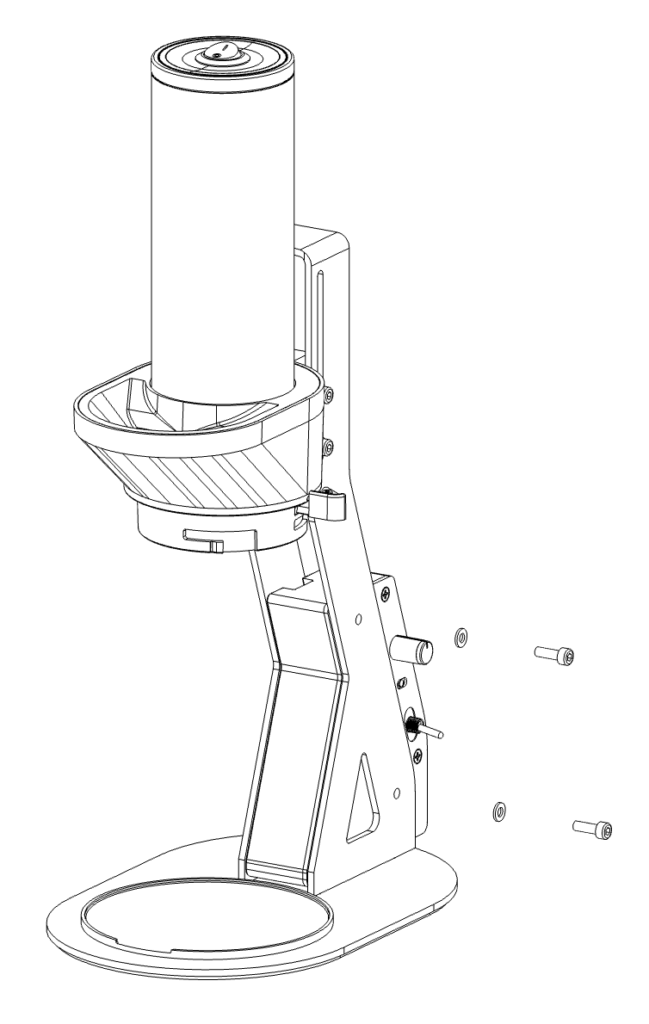
Step 2: Slide motor unit into slot opening of base stand and hold until secured with at least 2 screws in the next step.
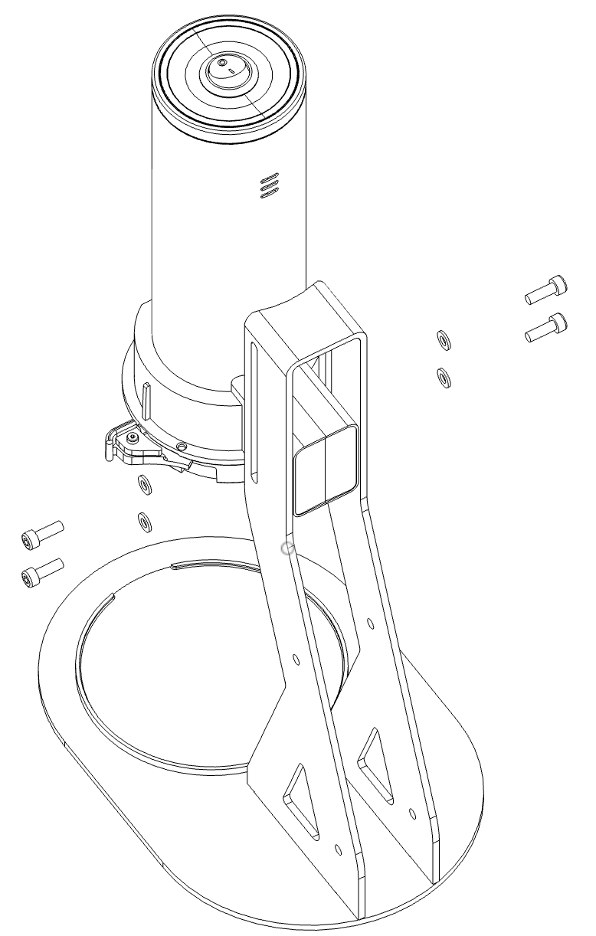
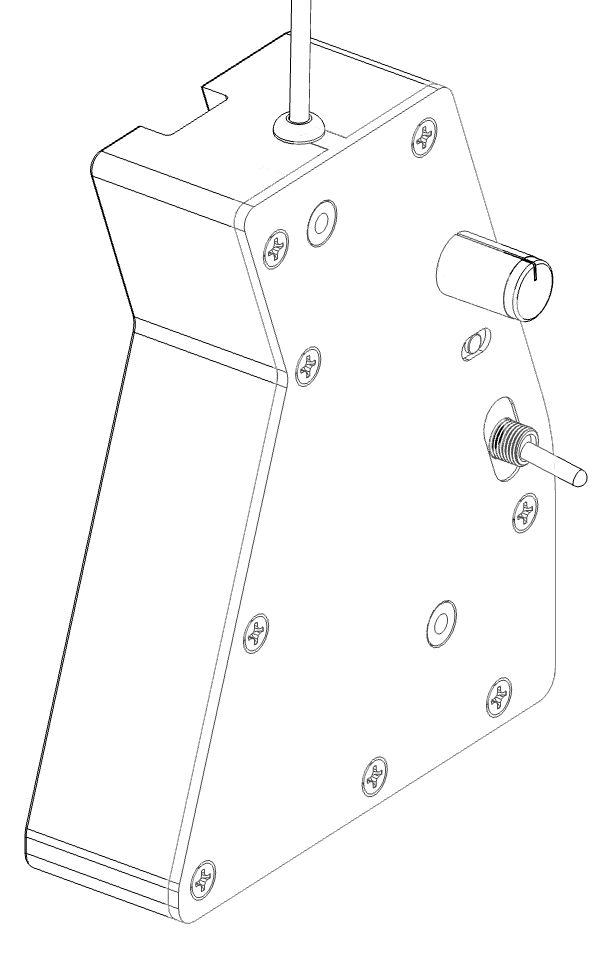
STEP 3:
- Use the provided allen key to assemble the motor unit to the base using the four M4 screws and washers.
- Position motor unit to the lowest position and raise as needed to accommodate your hand grinder.
- Hand tighten screws with slight pressure enough to keep the motor unit from sliding up and down the slot.
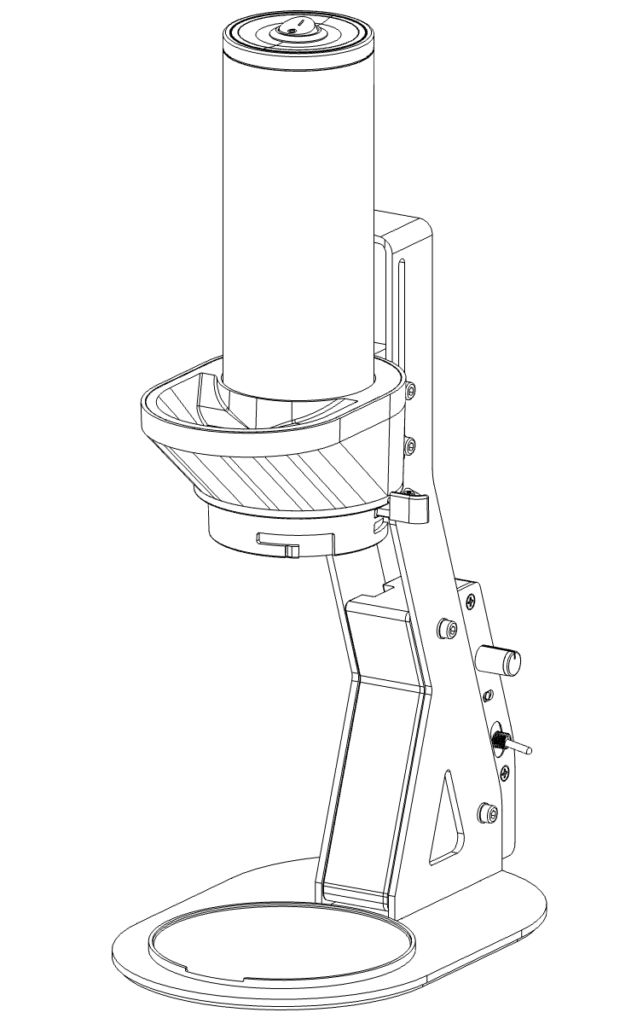
STEP 4:
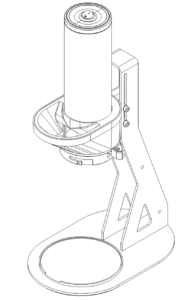
Slid funnel onto the motor unit and position as shown in the image.
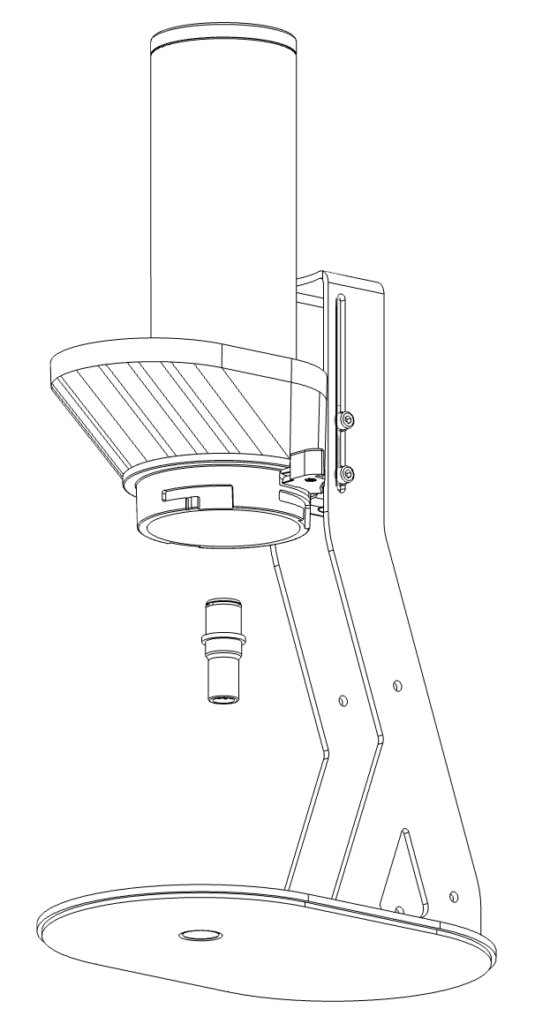
STEP 5:
Install the driver for your hand grinder by pushing the driver onto the center shaft of the motor unit. (Driver shown is the 5.5mm driver for Comandante grinders. Other drivers include the Kinu driver and the 6.35mm driver for 1ZPresso grinders.)
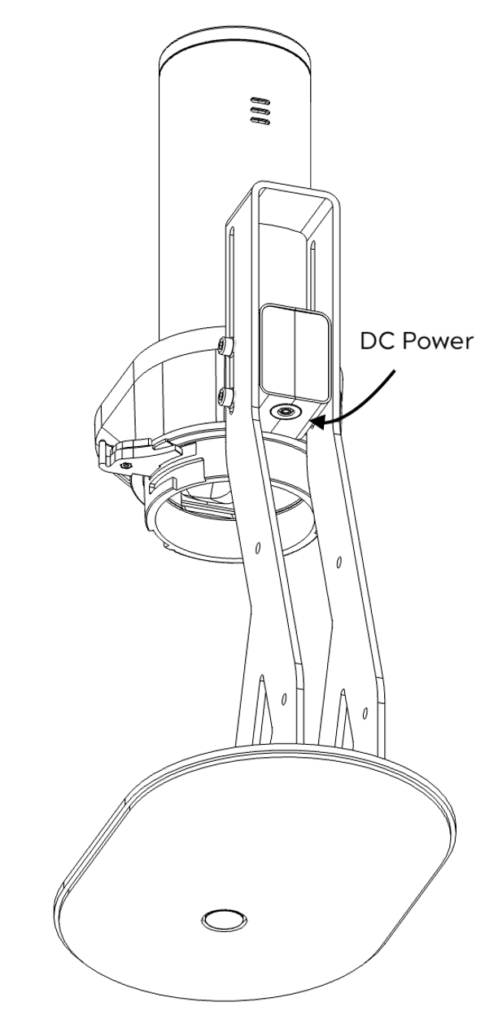
STEP 6: If you don’t have a speed controller, plug power adapter in and insert DC barrel connection into the bottom of the motor unit and you’ve finished setting up the motor unit. Flip the switch on the top to turn the motorizer on and off!
[Optional] The following steps are for installation of the Speed Module for higher clarity brews with less body. To skip these steps and go straight to lock collar installation.
Slide speed module into the slot of the base stand.
Fasten the speed module to the base with the two washers and two screws supplied with the speed module.
- Plug the DC connector from the speed module into the bottom of the motor unit and tuck the excess cable into the pocket on the side of the module.
- Plug the power adapter DC barrel connector into the back of the speed module and you’re all set! Make sure the switch on the motor is switched on and then use the switch on the speed module to turn the motorizer on and off!
NOTE: We recommend, leaving the motor switch on and powering the motorizer using the speed module for minimum power usage when idle.
Installing your C40 lock collar
For instructions on how to install your C40 lock collar follow the youtube installation video link below.
NOTE: make sure to loosen your M3 screw on the local collar allowing it to expand before following the video below.
NOTE: make sure to use the correct silicone bands – grey bands for wooden exterior C40s and black bands labelled ‘POWDER COAT’ bands for powder coated C40s.
Installing your C60 lock collar (NOTE! This is for the C60 not the C40!)
For instructions on how to install your C60 lock collar follow the youtube installation video link below.
NOTE: make sure to loosen the M3 screws on the local collar allowing it to expand before following the video below.
NOTE: make sure to use the two black bands labelled ‘MADKAT COFFEE’ (not ‘POWDER COAT’) included with your C60 collar to install the C60 lock collar onto your C60.
Installing your Kinu lock collar
For instructions on how to install your Kinu lock collar follow the youtube installation video link below.
NOTE: make sure to loosen the M3 screw on the local collar insert allowing it to expand before following the video below.
NOTE: make sure to use the single black band labelled ‘MADKAT COFFEE’ (not ‘POWDER COAT’ or ‘WOODEN’) included with your Kinu collar.
Installing your ZP6 lock collar
For instructions on how to install your ZP6 lock collar follow the youtube installation video link below.
NOTE: Make sure the collar is installed evenly and level with the grinder.
NOTE: Make sure to use the two bands included with the ZP6 collar labelled ‘160’
Installing your J-Max lock collar
For instructions on how to install your J-Max lock collar follow the youtube installation video link below.
NOTE: If you find the J-Max is slipping and rotating within the collar due to high torque requirement, turn the motorizer off and see instructions here on how to add additional grip strength to the collar using the included spare silicone tape.
NOTE: Make sure to use the smaller allen key to install the J-Max. The 4ea M2.5 screws must be loosed to allow the collar to fit onto the bands. Make sure the collar is installed evenly and level with the grinder.
NOTE: Make sure to use the two bands included with the J-Max.
Installing your J-Ultra lock collar
For instructions on how to install your J-Ultra lock collar follow the youtube installation video link below.
NOTE: If you find the J-Ultra is slipping and rotating within the collar due to high torque requirement, turn the motorizer off and see instructions here on how to add additional grip strength to the collar using the included spare silicone tape.
NOTE: Make sure the collar is installed evenly and level with the grinder.
NOTE: Make sure to use the two bands included with the J-Ultra.